How gorgeous are these Stampin' Up Fabric Flowers!
Email me for instructions.
Meditate. Live purely. Be quiet. Do your work with mastery. Like the moon, come out from behind the clouds! Shine. ~Buddha
Thursday, October 20, 2011
Monday, October 17, 2011
Sydney Regional Swap 2011
I made these cute fabric tissue packet holders using the Stampin' Up!"Flirtatious' fabrics and a matching gift tag using a strip of material to make a fabric flower with a Stampin' Up!'itty bitty' clear button in the middle.
These are very quick to make, email me for instructions.
These are very quick to make, email me for instructions.
Monday, July 25, 2011
Slider Gift with Card

I made up these Tote kits to sell at my Daughter's Girls Brigade Craft Fair at the Blacktown Uniting Church. The kits were very popular.
Stampin' Up supplies;
Bold Brights designer series paper.
July promotion Icecream Palor ribbon and button bundle.
Whisper White and Confetti White for tote.
Assorted coloured cardstock for flowers.
Saturday, July 9, 2011
Mother/ Daughter Cardmaking Class


The kids and mum's enjoyed a inspiring card making class. The kids made a handbag/tote using the Stampin' Up BigShot Top Note and and Blossom Party.The colours Daffodil Delight, Tempting Turquoise and Melon Mambo were inspired from the July ribbon and button promotion and is perfect for this age group of girls 5 years to 12 years.
The star stamp set for the day was Strenght and Hope.
The mum's enjoyed making a fun and simple card. Which was copy I think of Sue Madex.
Tuesday, May 10, 2011
New Baby Boy Card
Mother's Day Card
Saturday, April 30, 2011
Thursday, April 28, 2011
Sew Suite
Friday, April 15, 2011
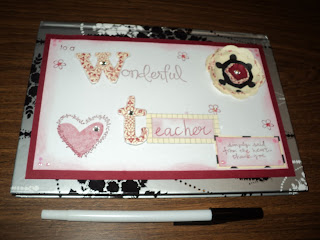
Wonderful Teacher Guest Book
Thursday, March 10, 2011
Handy Craft Caddie Instructions
From the Quick&Crafty Magazine January 2009
Materials
Sateen Lining, plain
Cotton Fabric, patterned
Piping Cord,12mm jumbo
Carboard, 10cm square
Sewing machine and matching thread.
Steps
- From Plain lining fabric, cut a rectangle to 36cmX42cm, to form the inner part of the bag.
- Trim another piece to 18cm X84cm, for the lower pockets and two 12cm squares for the base.
- From the patterned fabric cut a section to 28cmX84cm, this is for the larger center pockets.
- Fold and press the two 84cm pieces in half lengthways and place the narrower plain rectangle on top of the patterned section, matching raw edges at the base. Find the center of these and mark with a pin along the base. Locate the mid-point on the 42cm edge of the remaining rectangle and match to the precious marking.
- Pin the ends pf the folded pieces to the two outer edges of the plain flat section, leaving 1cm allowance at each end; divide the excess fabric into four equal pockets. Each one measuring 10cm wide, with 5cm of fabric either side for 2.5cm pleats.
- Pin the pleats in place and stitch across the base to secure. Sew between each pocket to hold in place. Match the1cm seam allowance, forming a tube with the pockets inside, and stitch together. Turn to the right side and fold the top edge of the inner rectangle over.
- Stitch one of the 12cm square to the base of the tub; one pocket should fit along the edge of the square. Stitch with a 1cm seam allowance, clipping into it on each side of the pocket to enable the square to be attached. Stick the remaining fabric square to a piece of cardboard the same size and push into the inside base.
- Cut a strip of the patterned fabric 6.5cm X 45cm. Fold and press in 1cm each long edge. Place piping cord along the strip and then fold the material over the cord, stitching the two folded edges together close to the piping with a zipper foot. Attach to the bag by sewing the two ends inside two opposite pockets.
Contact me if you have any questions. I would love to see your creations so send me a photo.
If you want one and don’t have time to make it, contact me as I may have some for sale.
Saturday, February 19, 2011
Subscribe to:
Comments (Atom)


